Windows Development
Environment
Install Visual Studio (VS)
- Open a CMD terminal and run the commands below:
Install Visual Studio (Community, Professional, or
Enterprise)
winget install --id Microsoft.VisualStudio.2022.Community -e
#winget install --id Microsoft.VisualStudio.2022.Professional -e
#winget install --id Microsoft.VisualStudio.2022.Enterprise -e
Add workloads Desktop development with C++ and
.NET Desktop development
cd "C:\Program Files (x86)\Microsoft Visual Studio\Installer"

/f "delims=" %i in ('vswhere -latest -property installationPath') do set "VSPATH=%i"

vs_installer.exe modify --installPath %VSPATH% --add Microsoft.VisualStudio.Workload.NativeDesktop --passive --norestart

vs_installer.exe modify --installPath %VSPATH% --add Microsoft.VisualStudio.Workload.ManagedDesktop --passive --norestart
Install Visual Studio Code
(VSCode)
- Open a CMD terminal and run the commands below:
Note that this assumes you have an Nvidia graphics
card
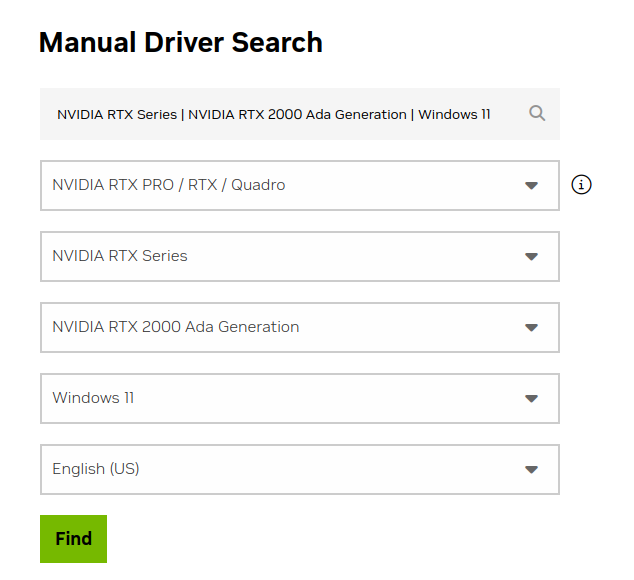
Visit: https://www.nvidia.com/en-us/drivers
Find your Nvidia Graphics card driver
- Scroll down to the Manual Driver Search
- Search for your Nvidia Graphics Card
- Make any adjustments in the drop-down combo boxes
- Cick the
Find button
On the next page, click the View button
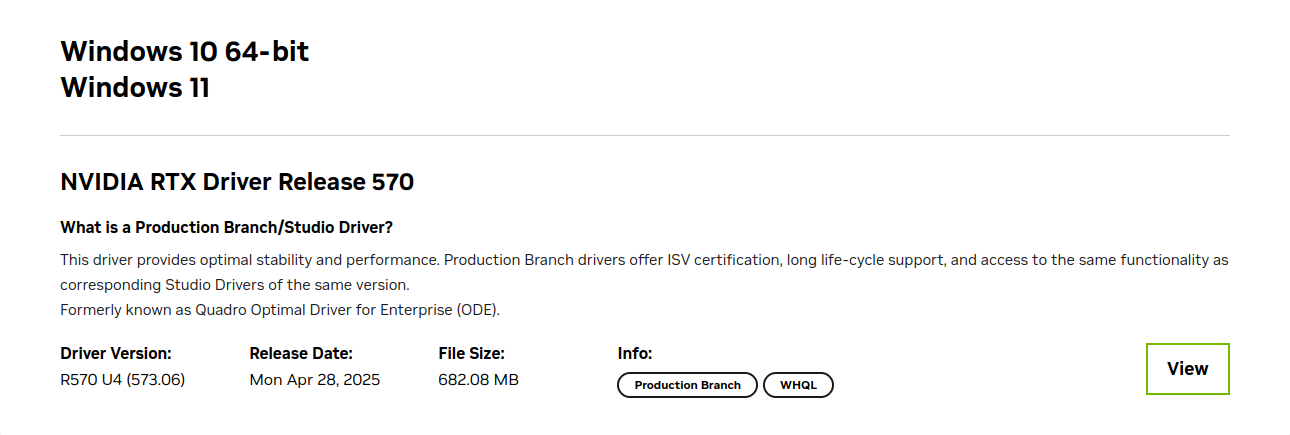
Click the Download button
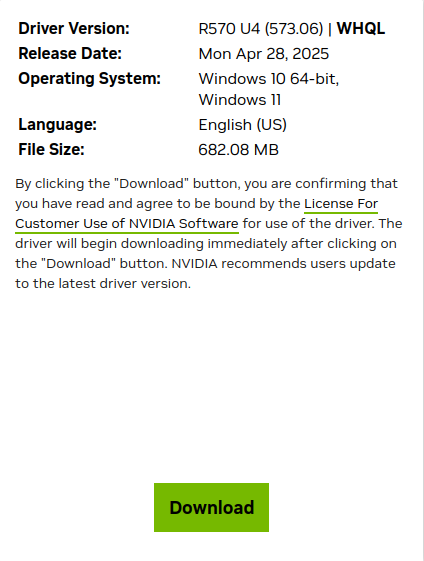
Double-click the downloaded file to start the installation
- Follow the instruction to install the driver.
Verify the installation by opening a CMD terminal and runnning
the command nvidia-smi
Make a note of the CUDA Version in the top right
- This is the highest version of the CUDA Toolkit
that the driver supports

Note that this assumes you have an Nvidia graphics
card
Visit: https://developer.nvidia.com/cuda-toolkit-archive
Choose a CUDA Toolkit version
- Click on a CUDA Toolkit version that your driver
supports
- Latest version: https://developer.nvidia.com/cuda-downloads
Choose:
- Operating System:
Windows
- Architecture:
x86_64
- Version:
10, 11,
Server 2022, or Server 2025
- Installer Type:
exe (local) or exe
(network)
- Click the
Download button

Double-click the downloaded file to start the installation
- Follow the instruction to install the CUDA Toolkit.
Verify the installation by opening a CMD terminal and runnning
the command nvcc
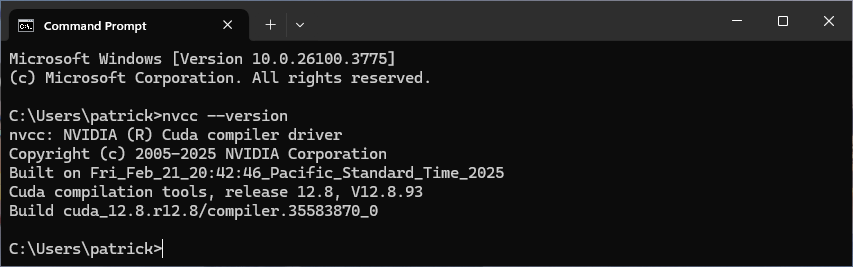
Note the CUDA compilation tools, release
- This is your CUDA Toolkit version
- It can’t be higher than your driver’s Cuda Version
(top right in
nvidia-smi)
(optional) If you also want to install cuDNN, you can download it
here:
- https://developer.nvidia.com/cudnn
- https://developer.nvidia.com/cudnn-archive
Install AMD Radeon and
AMD Ryzen Drivers
Note that this assumes you have an AMD Radeon graphics card
(or AMD Ryzen CPU)
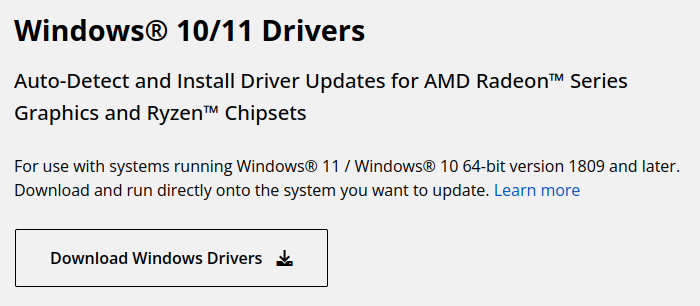
- Visit: https://www.amd.com/en/support/download/drivers.html
- Click the
Dowload Windows Driver button
- Double-click the downloaded file to start the installation
- Follow the instruction to install the AMD driver(s).
- https://www.amd.com/en/resources/support-articles/faqs/RSX2-INSTALL.html
Install HIP SDK
Note that this assumes you have an AMD Radeon graphics
card
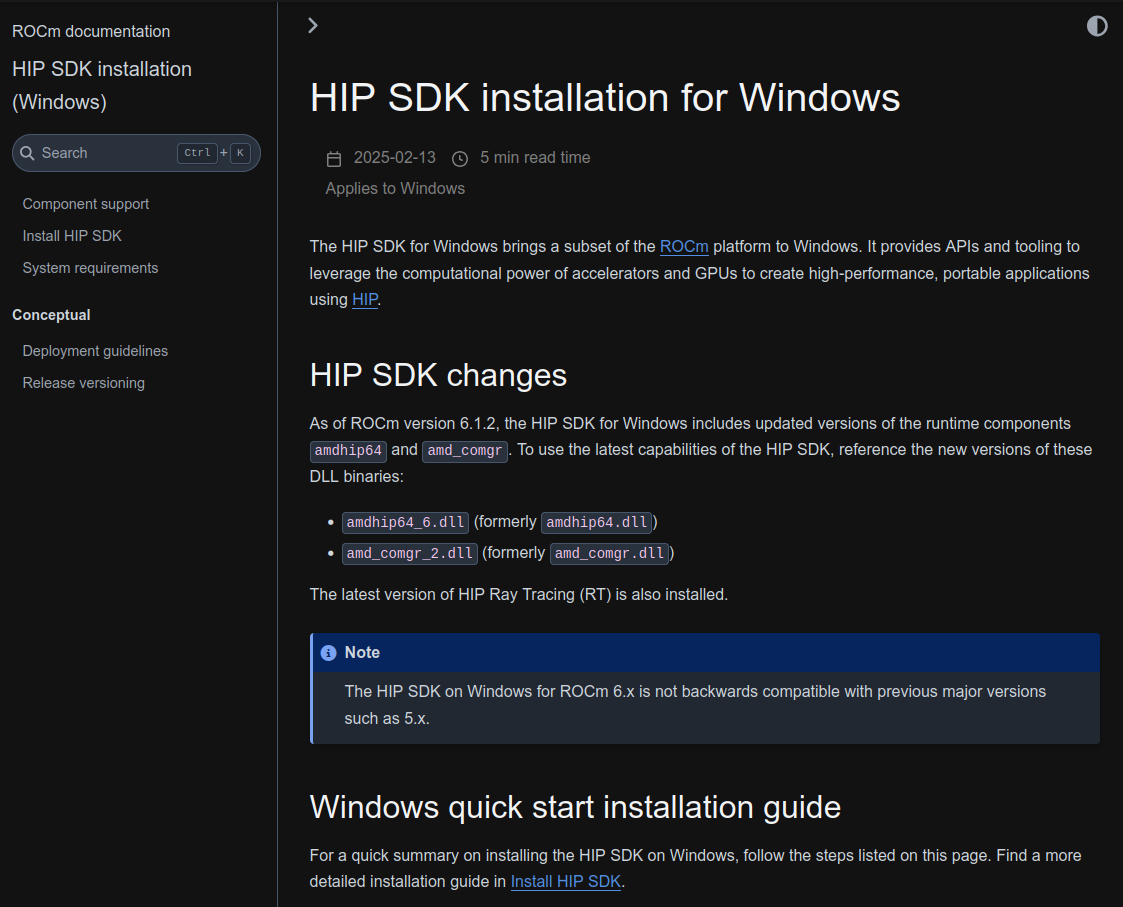
Visit: https://rocm.docs.amd.com/en/latest
In the left margin, under Install, click
HIP SDK on Windows
In the left margin, under
HIP SDk Installation (Windows), click
Install HIP SDK
Follow the instructions to install the HIP SDK.
Install Intel Driver(s)
Note that this assumes you have an Intel CPU and/or
GPU
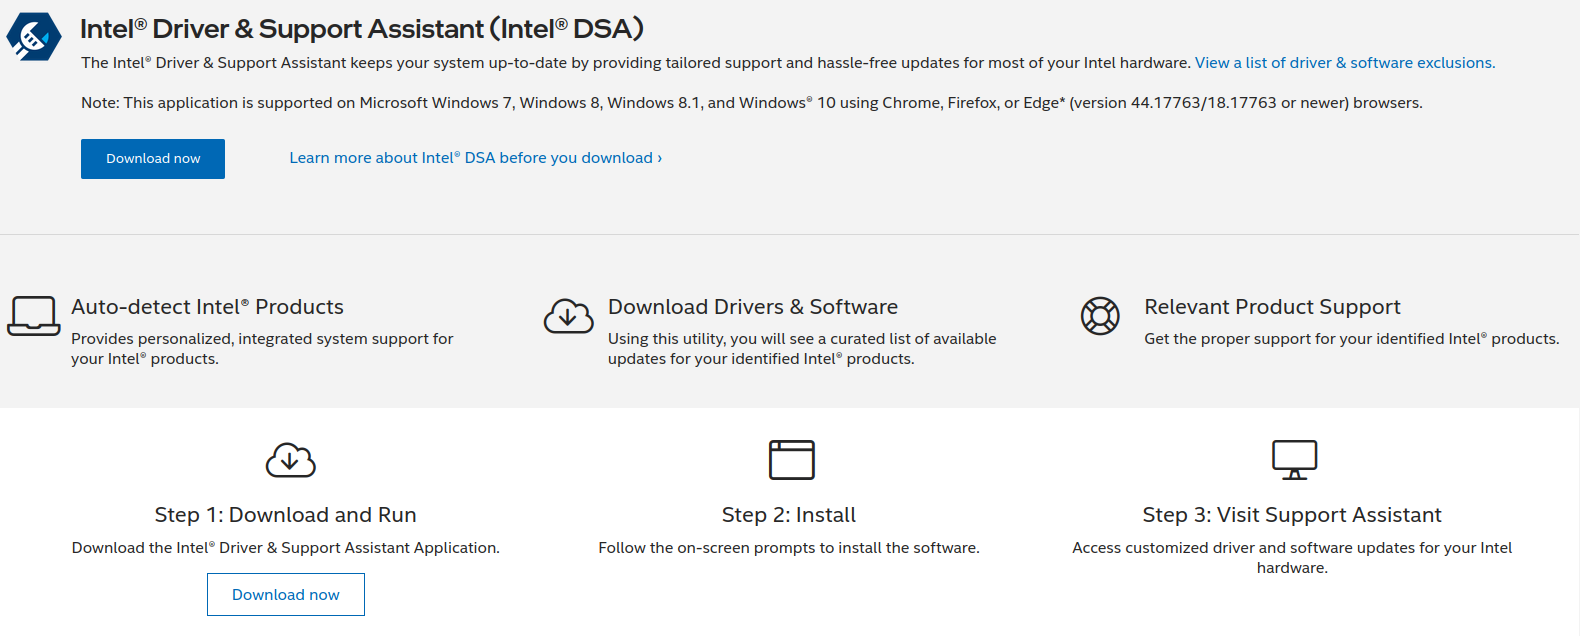
Visit:
https://www.intel.com/content/www/us/en/support/detect.html
Download the tool and update your Intel drivers
Note that this assumes you have an Intel CPU and/or
GPU
- Visit:
https://www.intel.com/content/www/us/en/developer/tools/oneapi/base-toolkit-download.html
- Choose:
- Packages:
Intel oneAPI Base Toolkit
- Operating System:
Windows
- Installer Type:
Offline Installer or
Online Installer
- Fill in:
- Business Email Address
- Country/Region
- Click the
Submit & Begin Download button
- Double-click the downloaded file to start the installation
- Follow the instruction to install the Intel oneAPI Base Toolkit

Install OpenCL SDK
Open a terminal, then run the commands below
Install Git
winget install --id Git.Git
Install VCPKG
git clone https://github.com/microsoft/vcpkg.git %LOCALAPPDATA%\Programs\vcpkg
cd %LOCALAPPDATA%\Programs\vcpkg
.\bootstrap-vcpkg.bat
setx PATH "%PATH%;%LOCALAPPDATA%\Programs\vcpkg"
Install OpenCL SDK and Integrate VCPKG it with Visual Studio
vcpkg install opencl:x64-windows
vcpkg integrate install
The OpenCL headers and libraries are now available here:
%LOCALAPPDATA%\\Programs\vcpkg\installed\x64-windows\include%LOCALAPPDATA%\\Programs\vcpkg\installed\x64-windows\lib
(Optional) Install GCC,
GDB, Clang, and LLDB
Open a terminal, then run the commands below
Install 7zip and wget
winget install --id 7zip.7zip
winget install --id GNU.Wget2
mklink %LOCALAPPDATA%\Microsoft\WinGet\Links\wget.exe %LOCALAPPDATA%\Microsoft\WinGet\Links\wget2.exe
Install WinLibs
wget -O winlibs.7z https://github.com/brechtsanders/winlibs_mingw/releases/download/14.2.0posix-12.0.0-ucrt-r3/winlibs-x86_64-posix-seh-gcc-14.2.0-llvm-19.1.7-mingw-w64ucrt-12.0.0-r3.7z
7z x winlibs.7z -o%LOCALAPPDATA%\Programs\WinLibs -y
del winlibs.7z
setx PATH "%PATH%;%LOCALAPPDATA%\Programs\WinLibs\mingw64\bin"
GCC, GDB, Clang, and LLDB are now available here:
%LOCALAPPDATA%\Programs\WinLibs\mingw64\bin